
 Aging mahogany - Les Paul with satin finish
I am going to age this Epiphone Les Paul (in Desert Sunburst) and expose the mahogany back to some UV using our SG-1-40 aging lamps. Crazy, huh? I expect this will darken the wood nicely and give it the look of an older, well loved guitar. So you know, this thin finish is very much like the finish used in kitchen cabinets, so this is a good analog for that.
Depending on how that goes, we may go full boat and UV age the entire finish. Being an imported guitar, I'm fairly certain they are using a thin polyurethane finish, which is also what American made Fenders (and other guitars) use.
Reference photos, taken with the cell phone (Samsung 5, no adjustments for color), click on image for a new window and a close up. On an unrelated note, I was very pleased with the sound and playability of the guitar. The grain doesn't line up so great, I had to shoot from a special angle, as from other angles, the top half of the guitar doesn't show the flaming very well, so C+ for flame quality but an A+ otherwise.
On an unrelated note: Sounds as good as any of the Gibson Les Pauls I've owned over the years, which is pretty shocking for a $500 guitar. Honestly, I kept it at the house for over a week just to play it, and odds are good it will go into my personal stable. I'm more of a Fender guy (was a Gibson guy in the 90s) but now I've sold all my Gibsons. This is a respectable substitute when you need to make some Les Paul sounds.
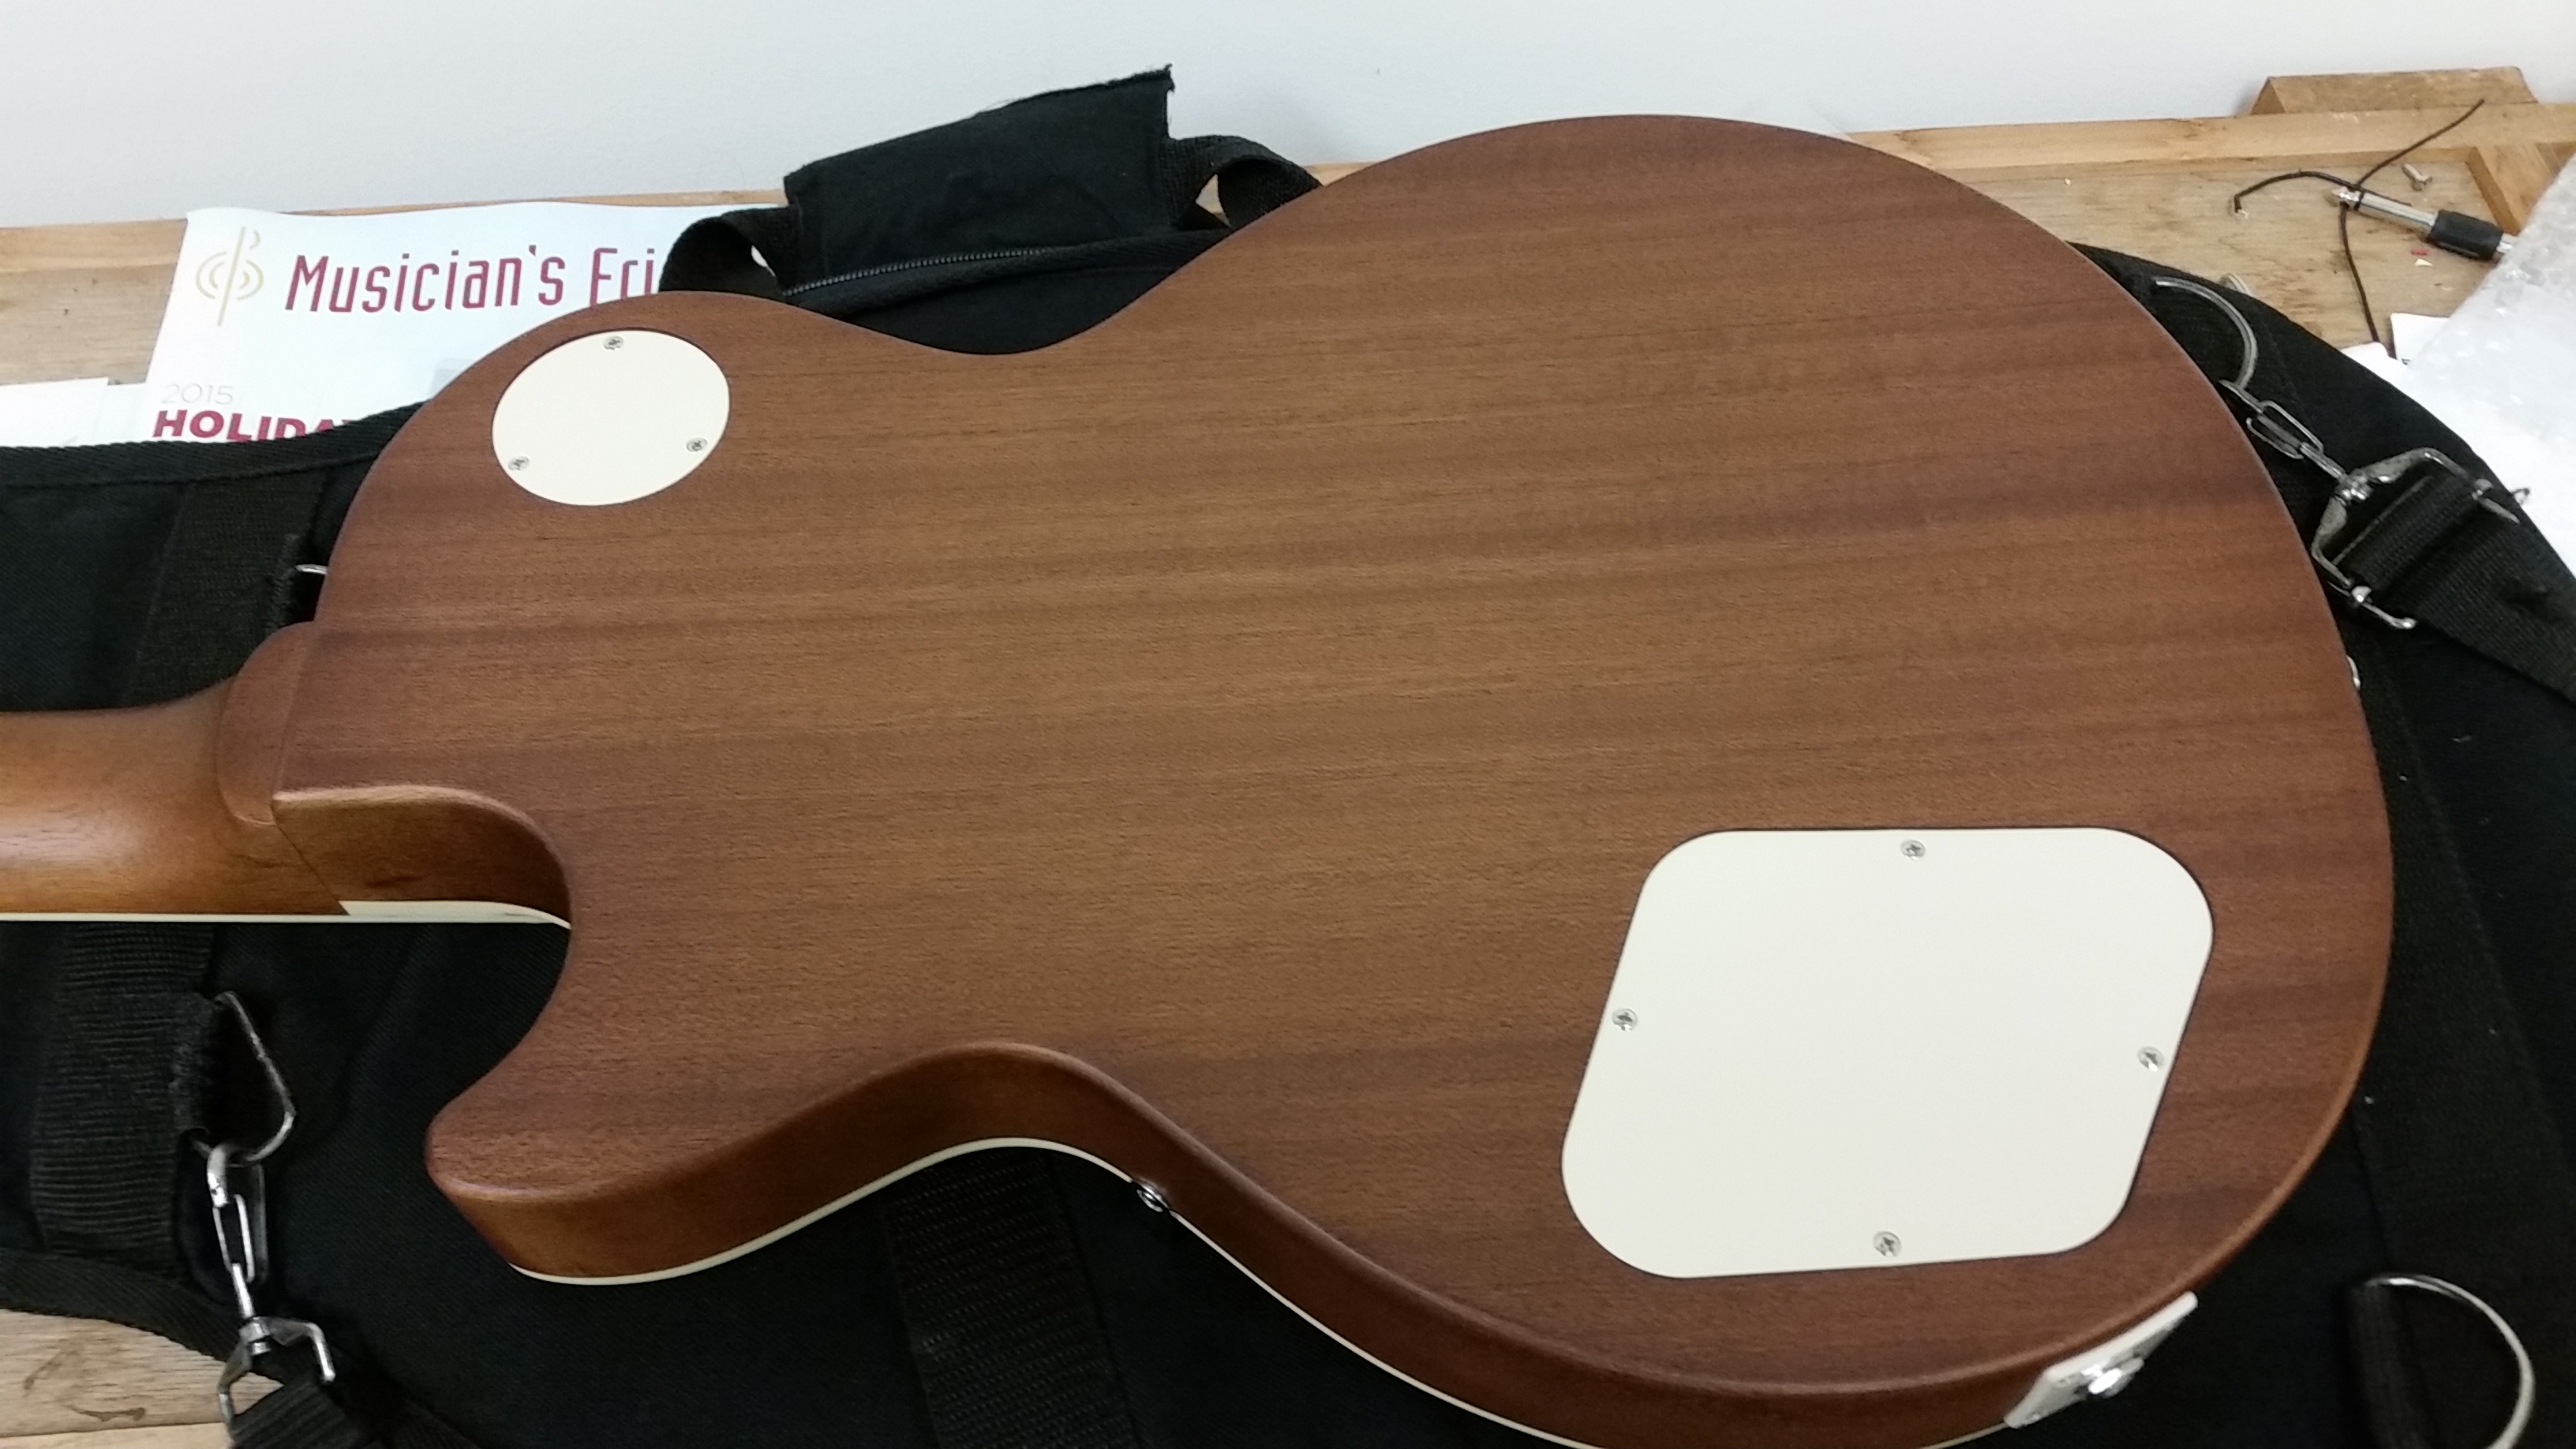
The back wood looks wonderful, better than the images show. That is the primary focus of this test, to age the backside and see how (if) it fades through a satin finish. Click on any image for a close up view in a new window.

This one has a fair flamed top. Honestly, this is showing it from the best angle, if you look at it from other angles, the top half flattens out a bit. If it was a Gibson, I would have returned it, but for $500, you can't expect AAAAA flamed maple.
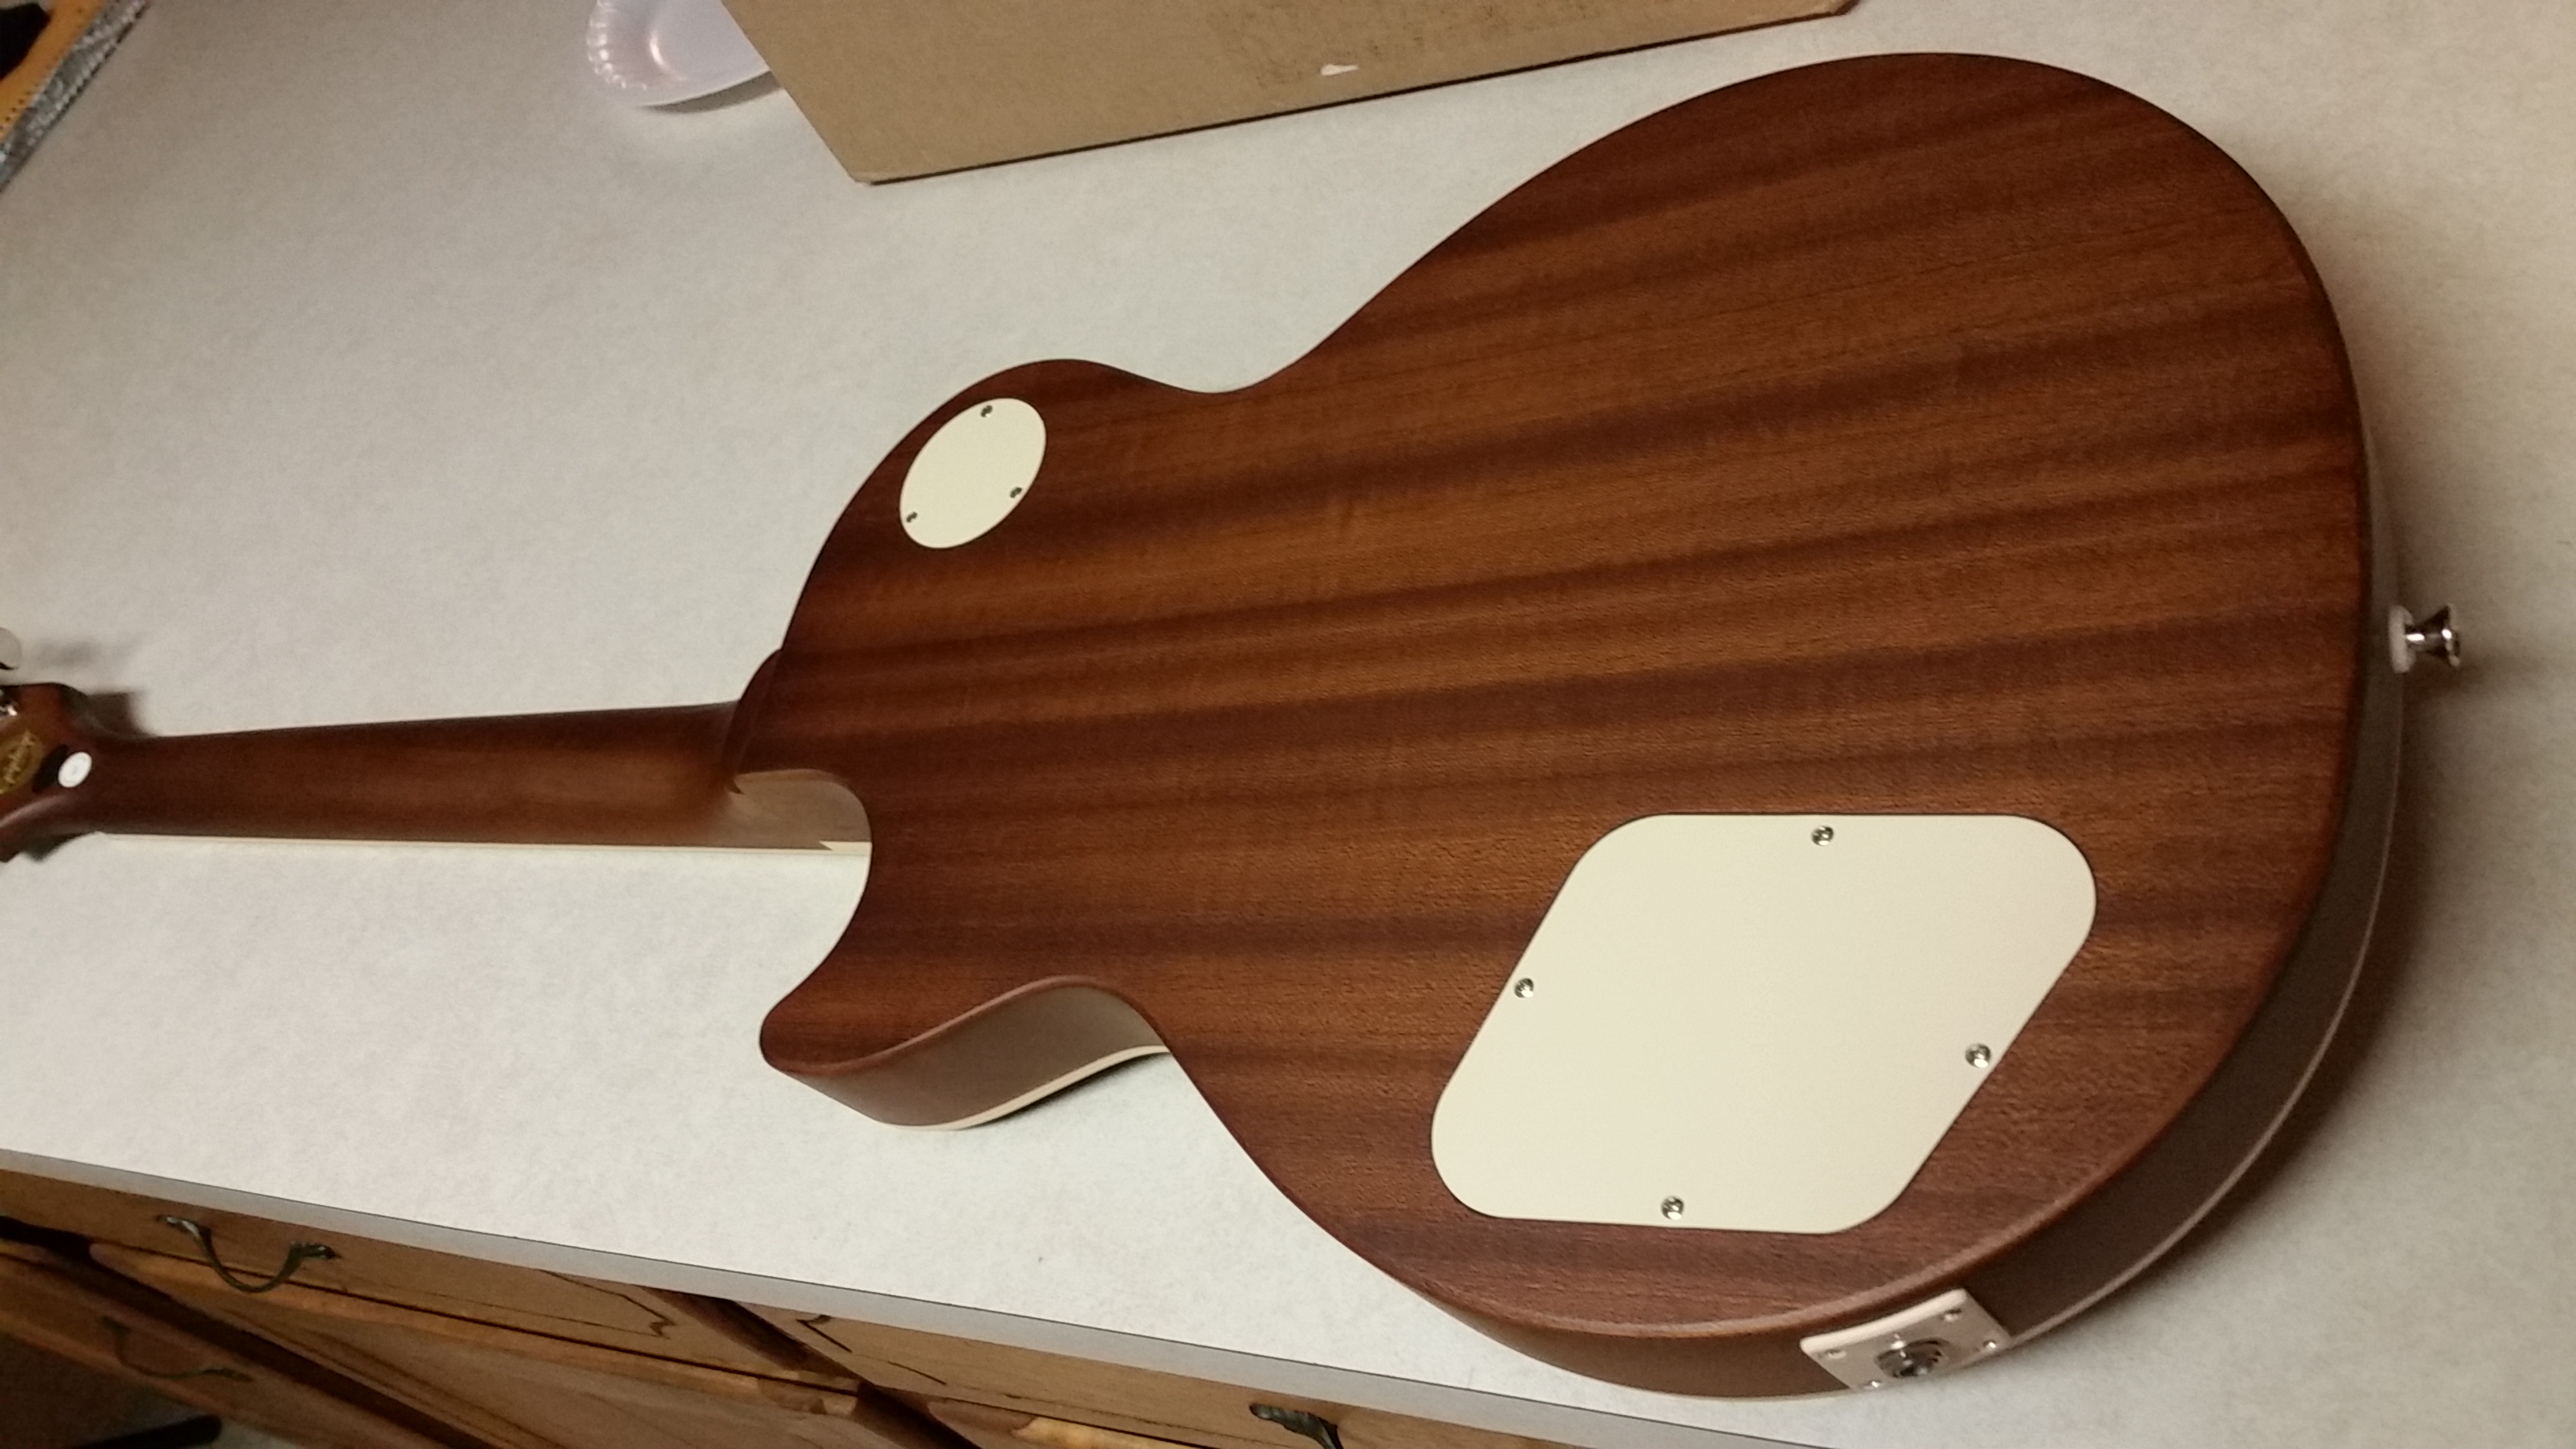
The bottom is really nice wood, hard to see the wood joins at all. The finish is kind of a flat one, including on the neck, but to be honest, that is what I prefer as I find glossy necks to be "sticky", and I usually work them down with 0000 steel wool anyway. I didn't have to do anything for this one to play or look nice.
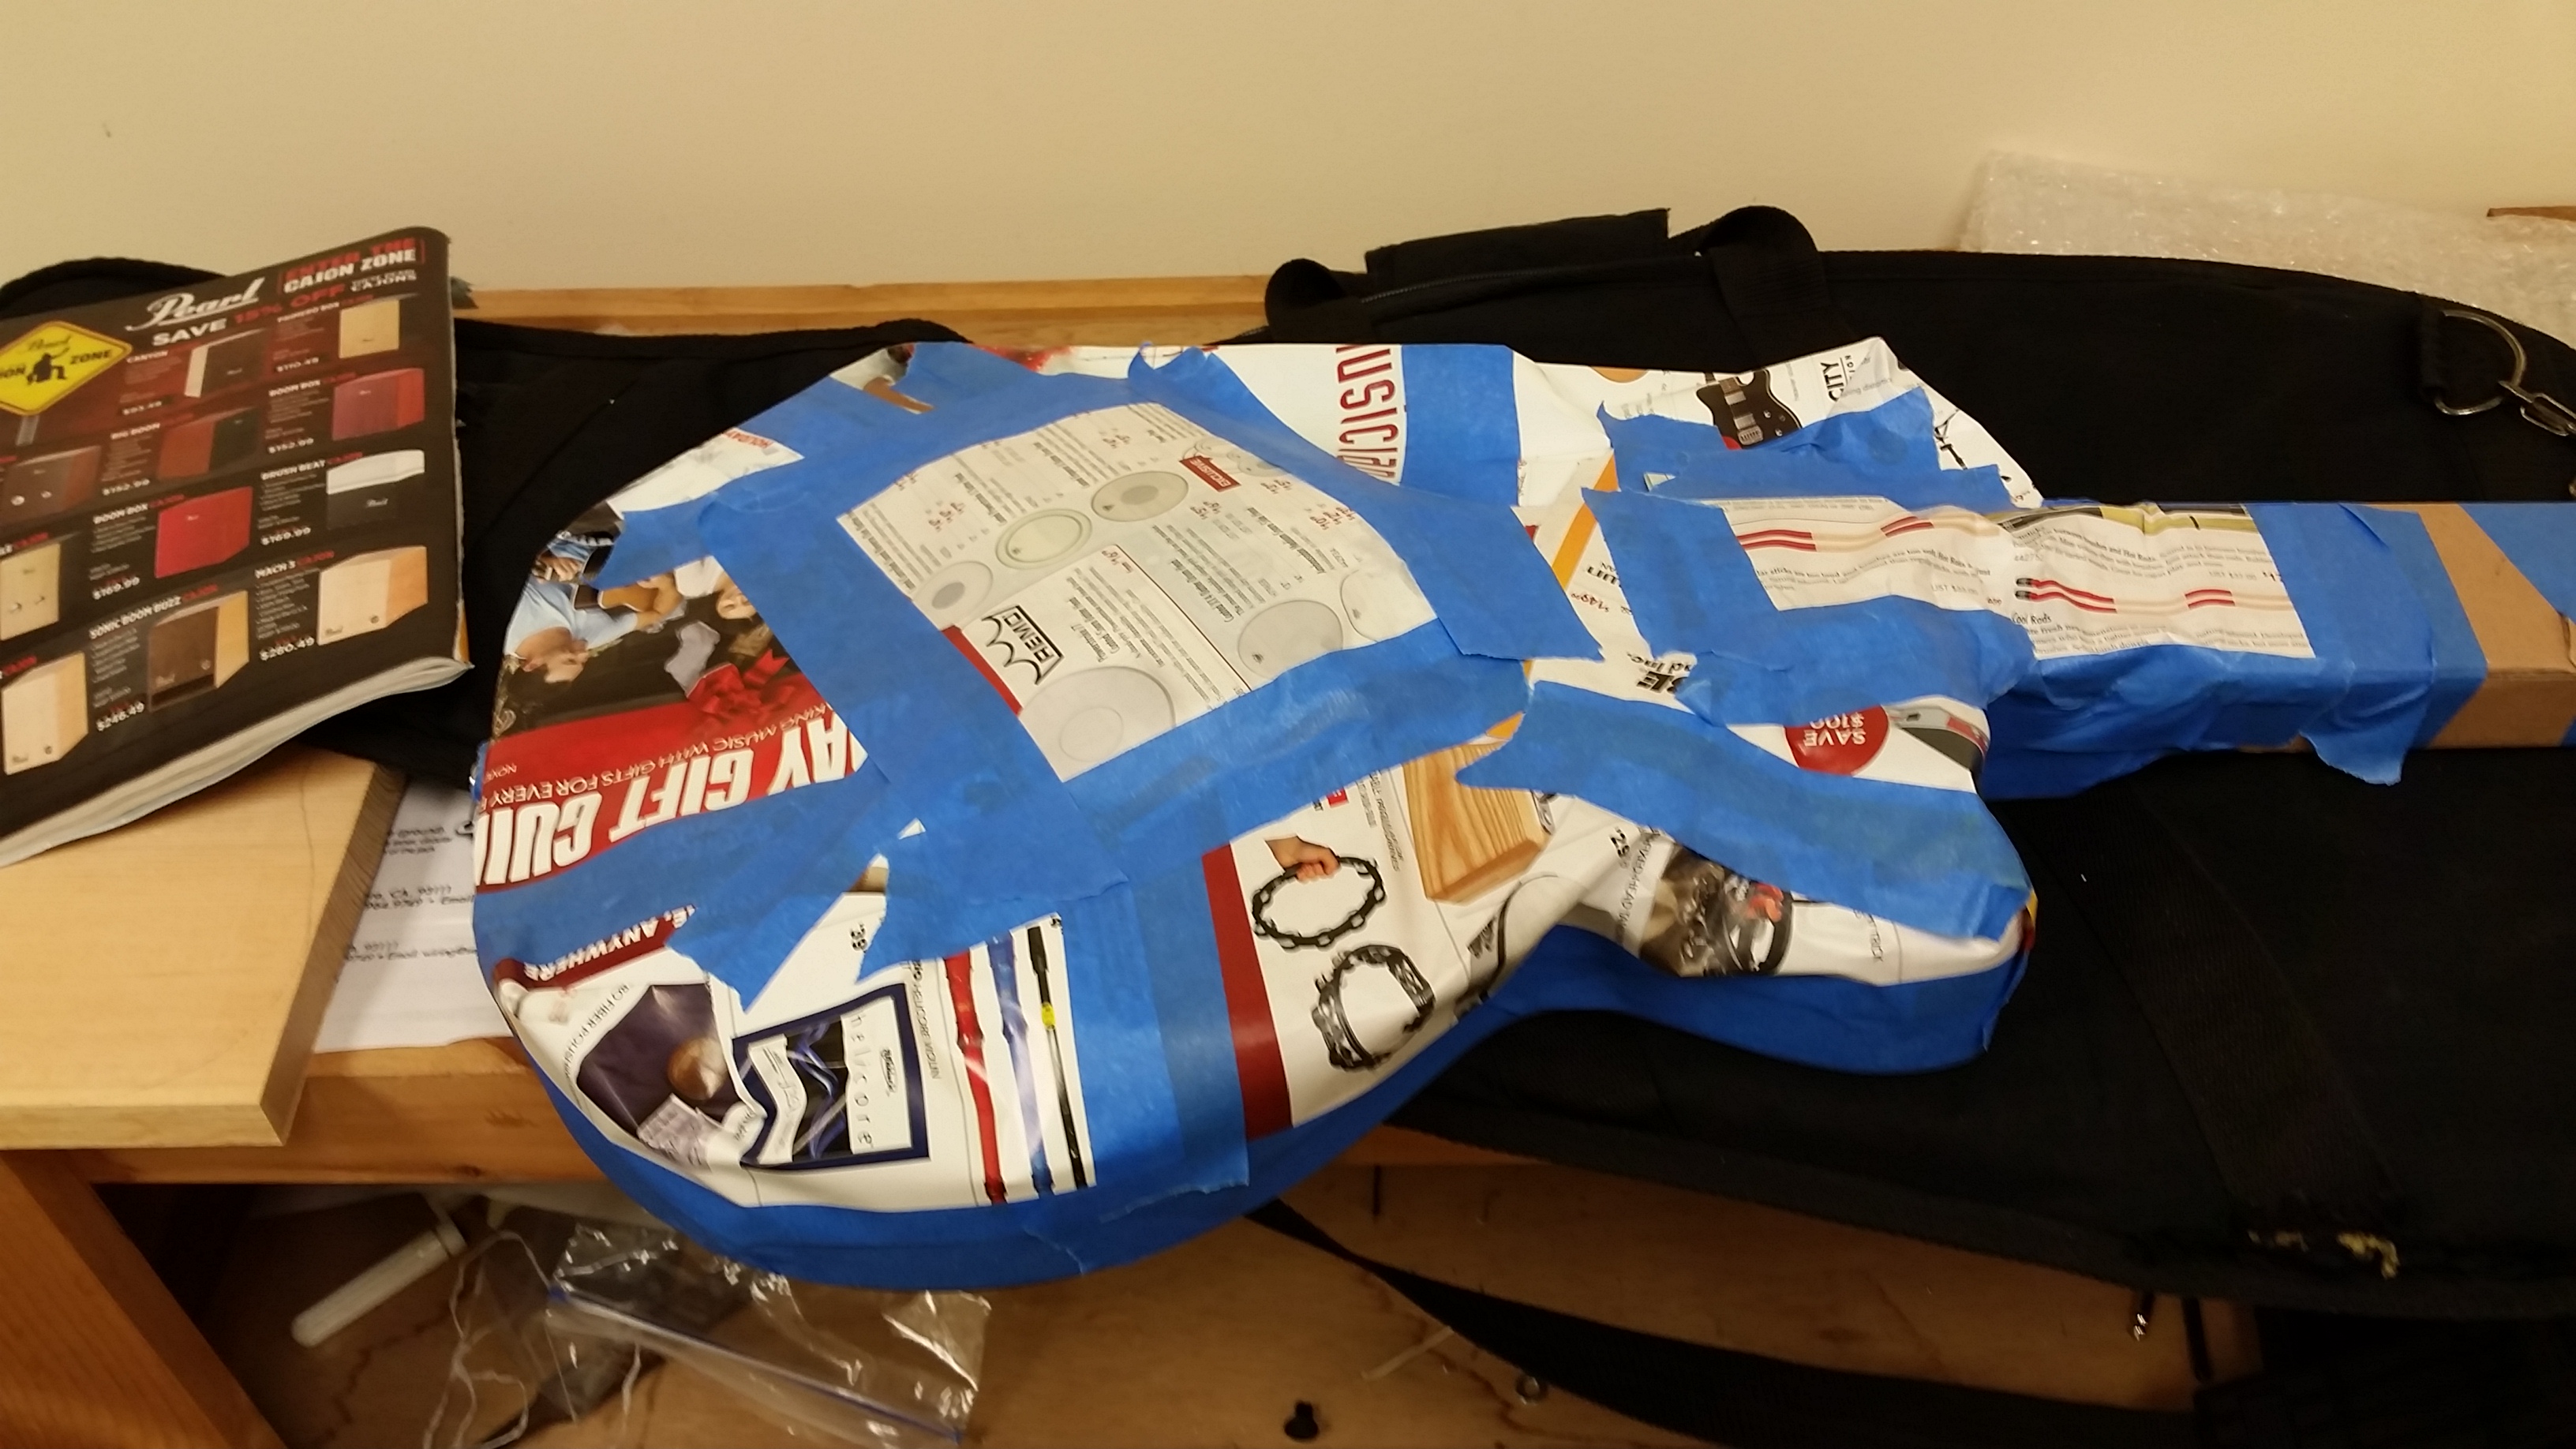
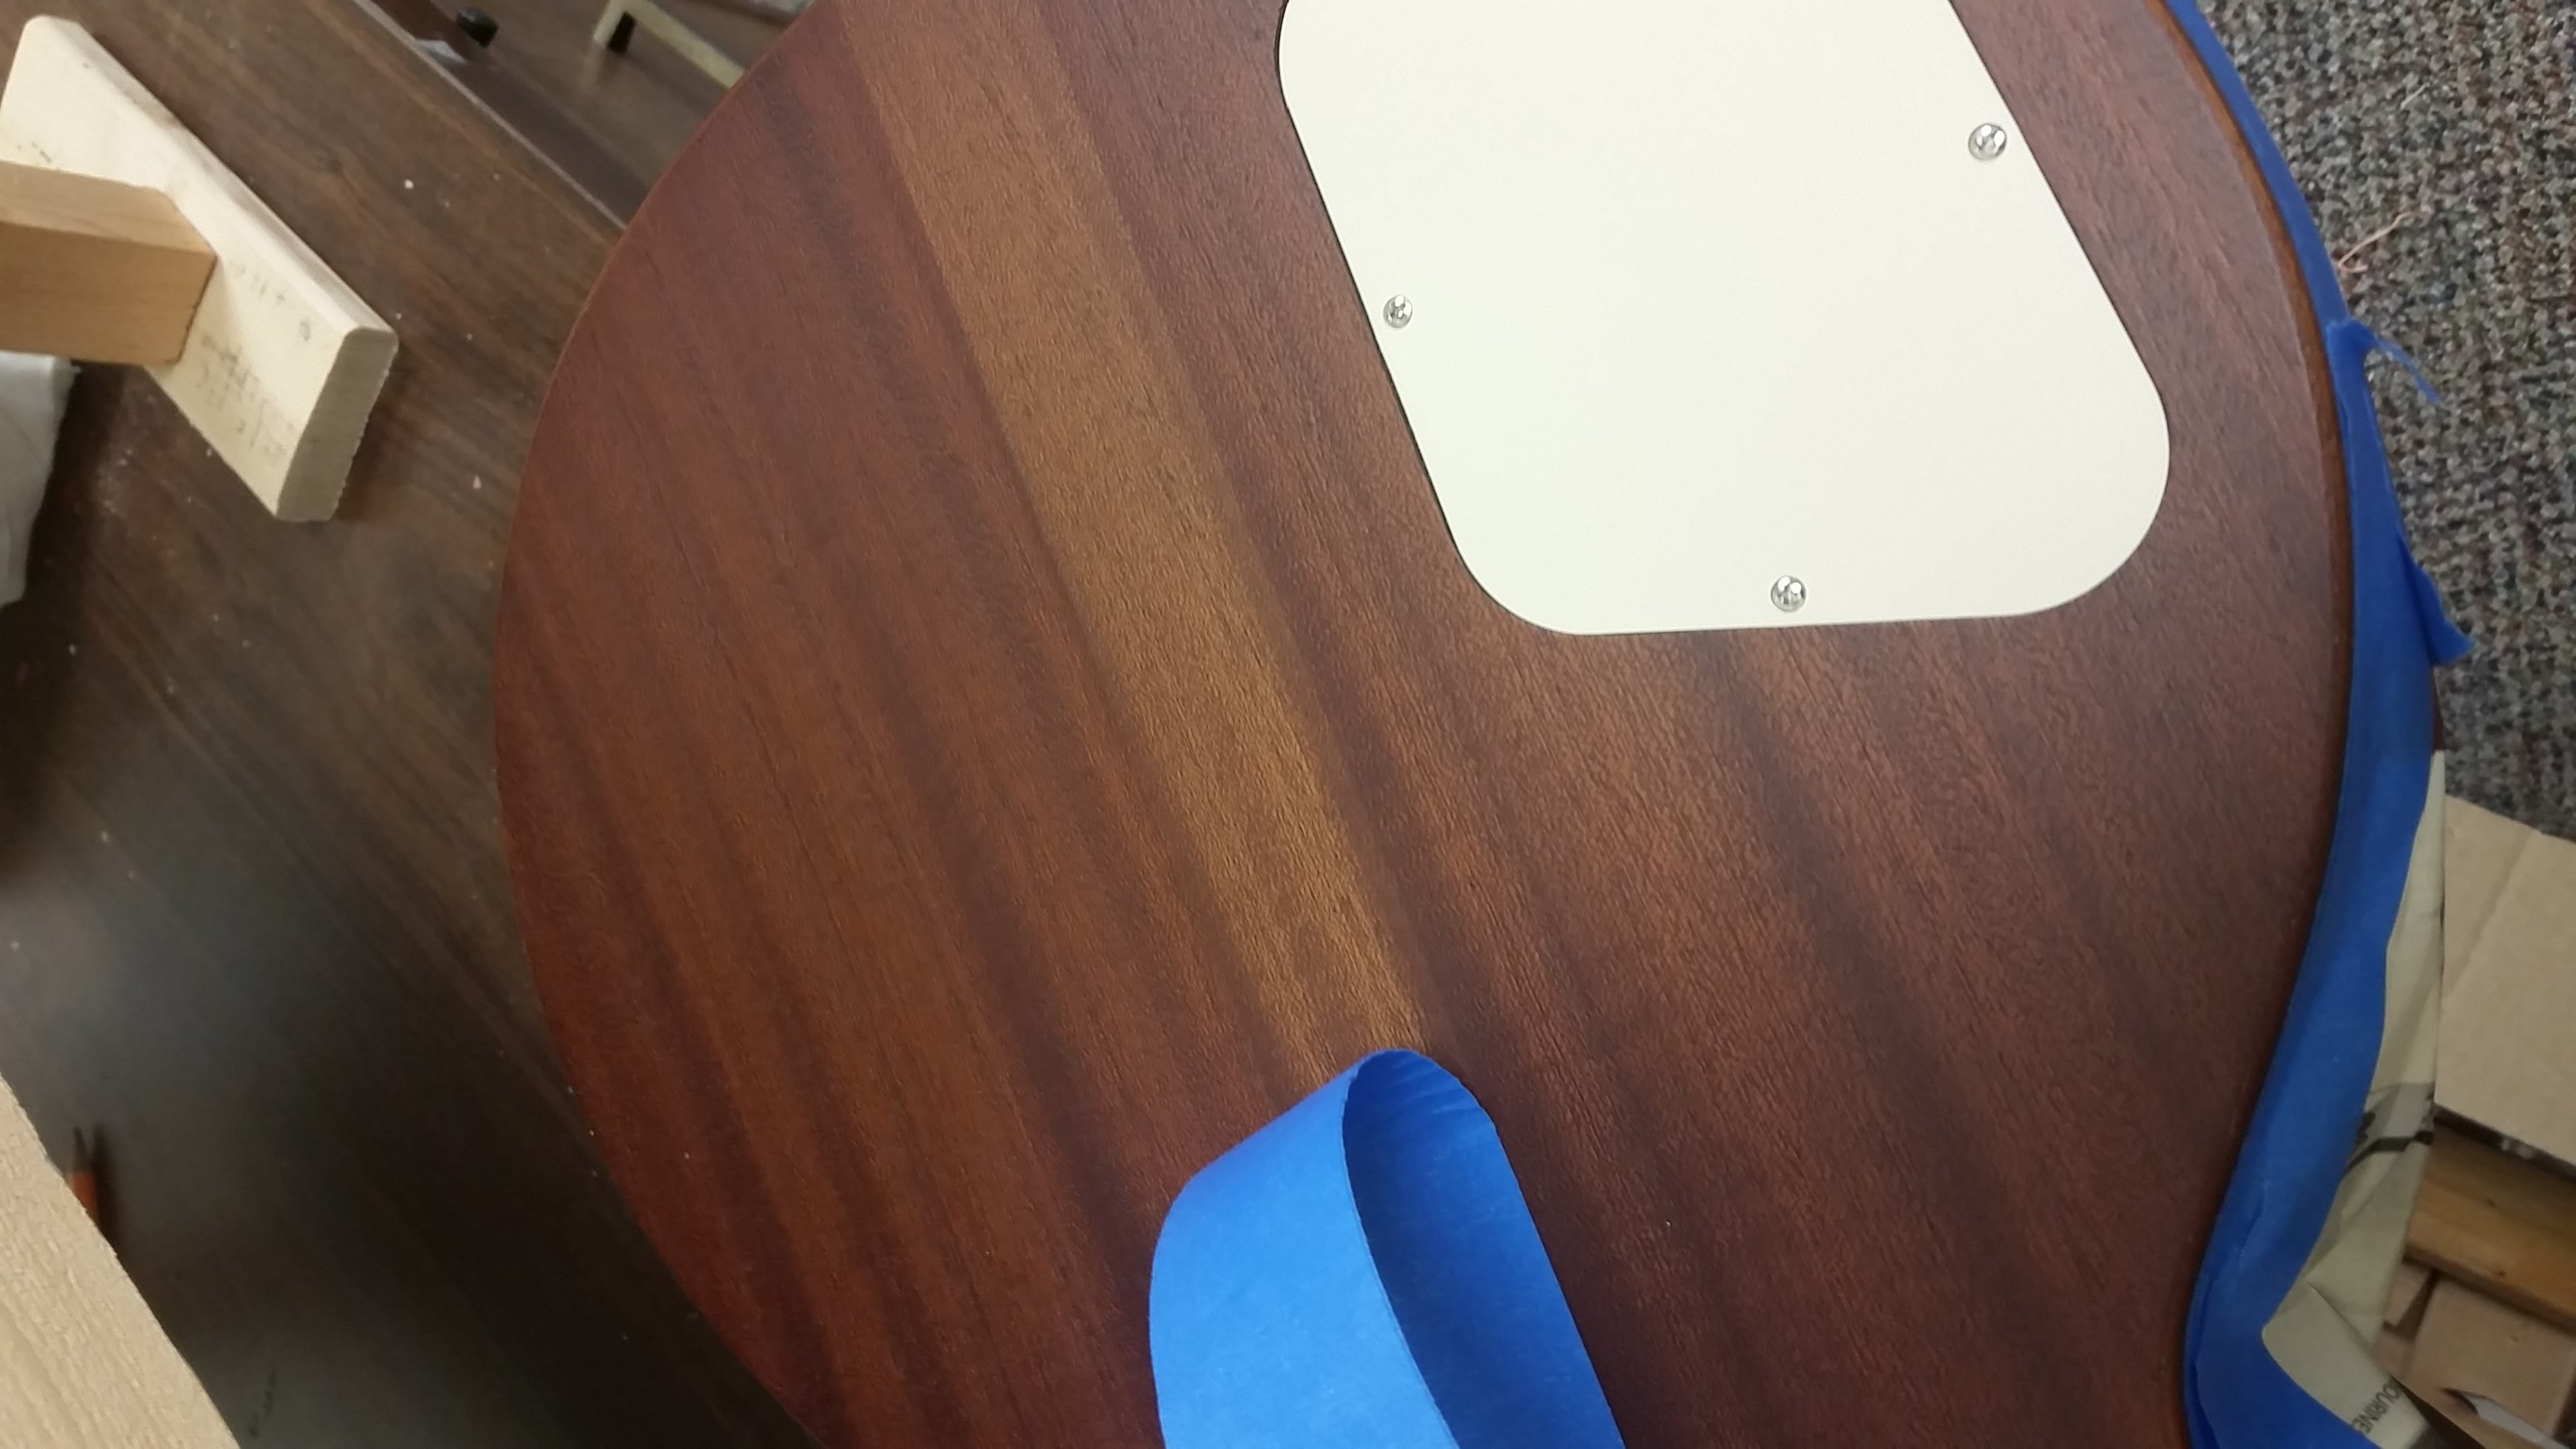
This is an unusual way to test, but I'm going to tape off the sides as well as the front, so I only have to worry about one flat surface and not the crooks and crannies of the cutaway, etc. Normally, you would age those too, but I'm trying to test the lights, not make this a real final product. I decided to try the blue painters tape after using regular masking tape meant a lot of rubbing alcohol last time, to get the glue off. The UV lights really beats up the tape, and that pushes the glue off into the finish. It comes off with alcohol just fine, but takes a lot of elbow grease. Here is the taping process.
You might notice no lab coats, no fancy materials. We don't really build guitars or finish them here, so we have to make do. I'm betting some of your methods aren't so different.
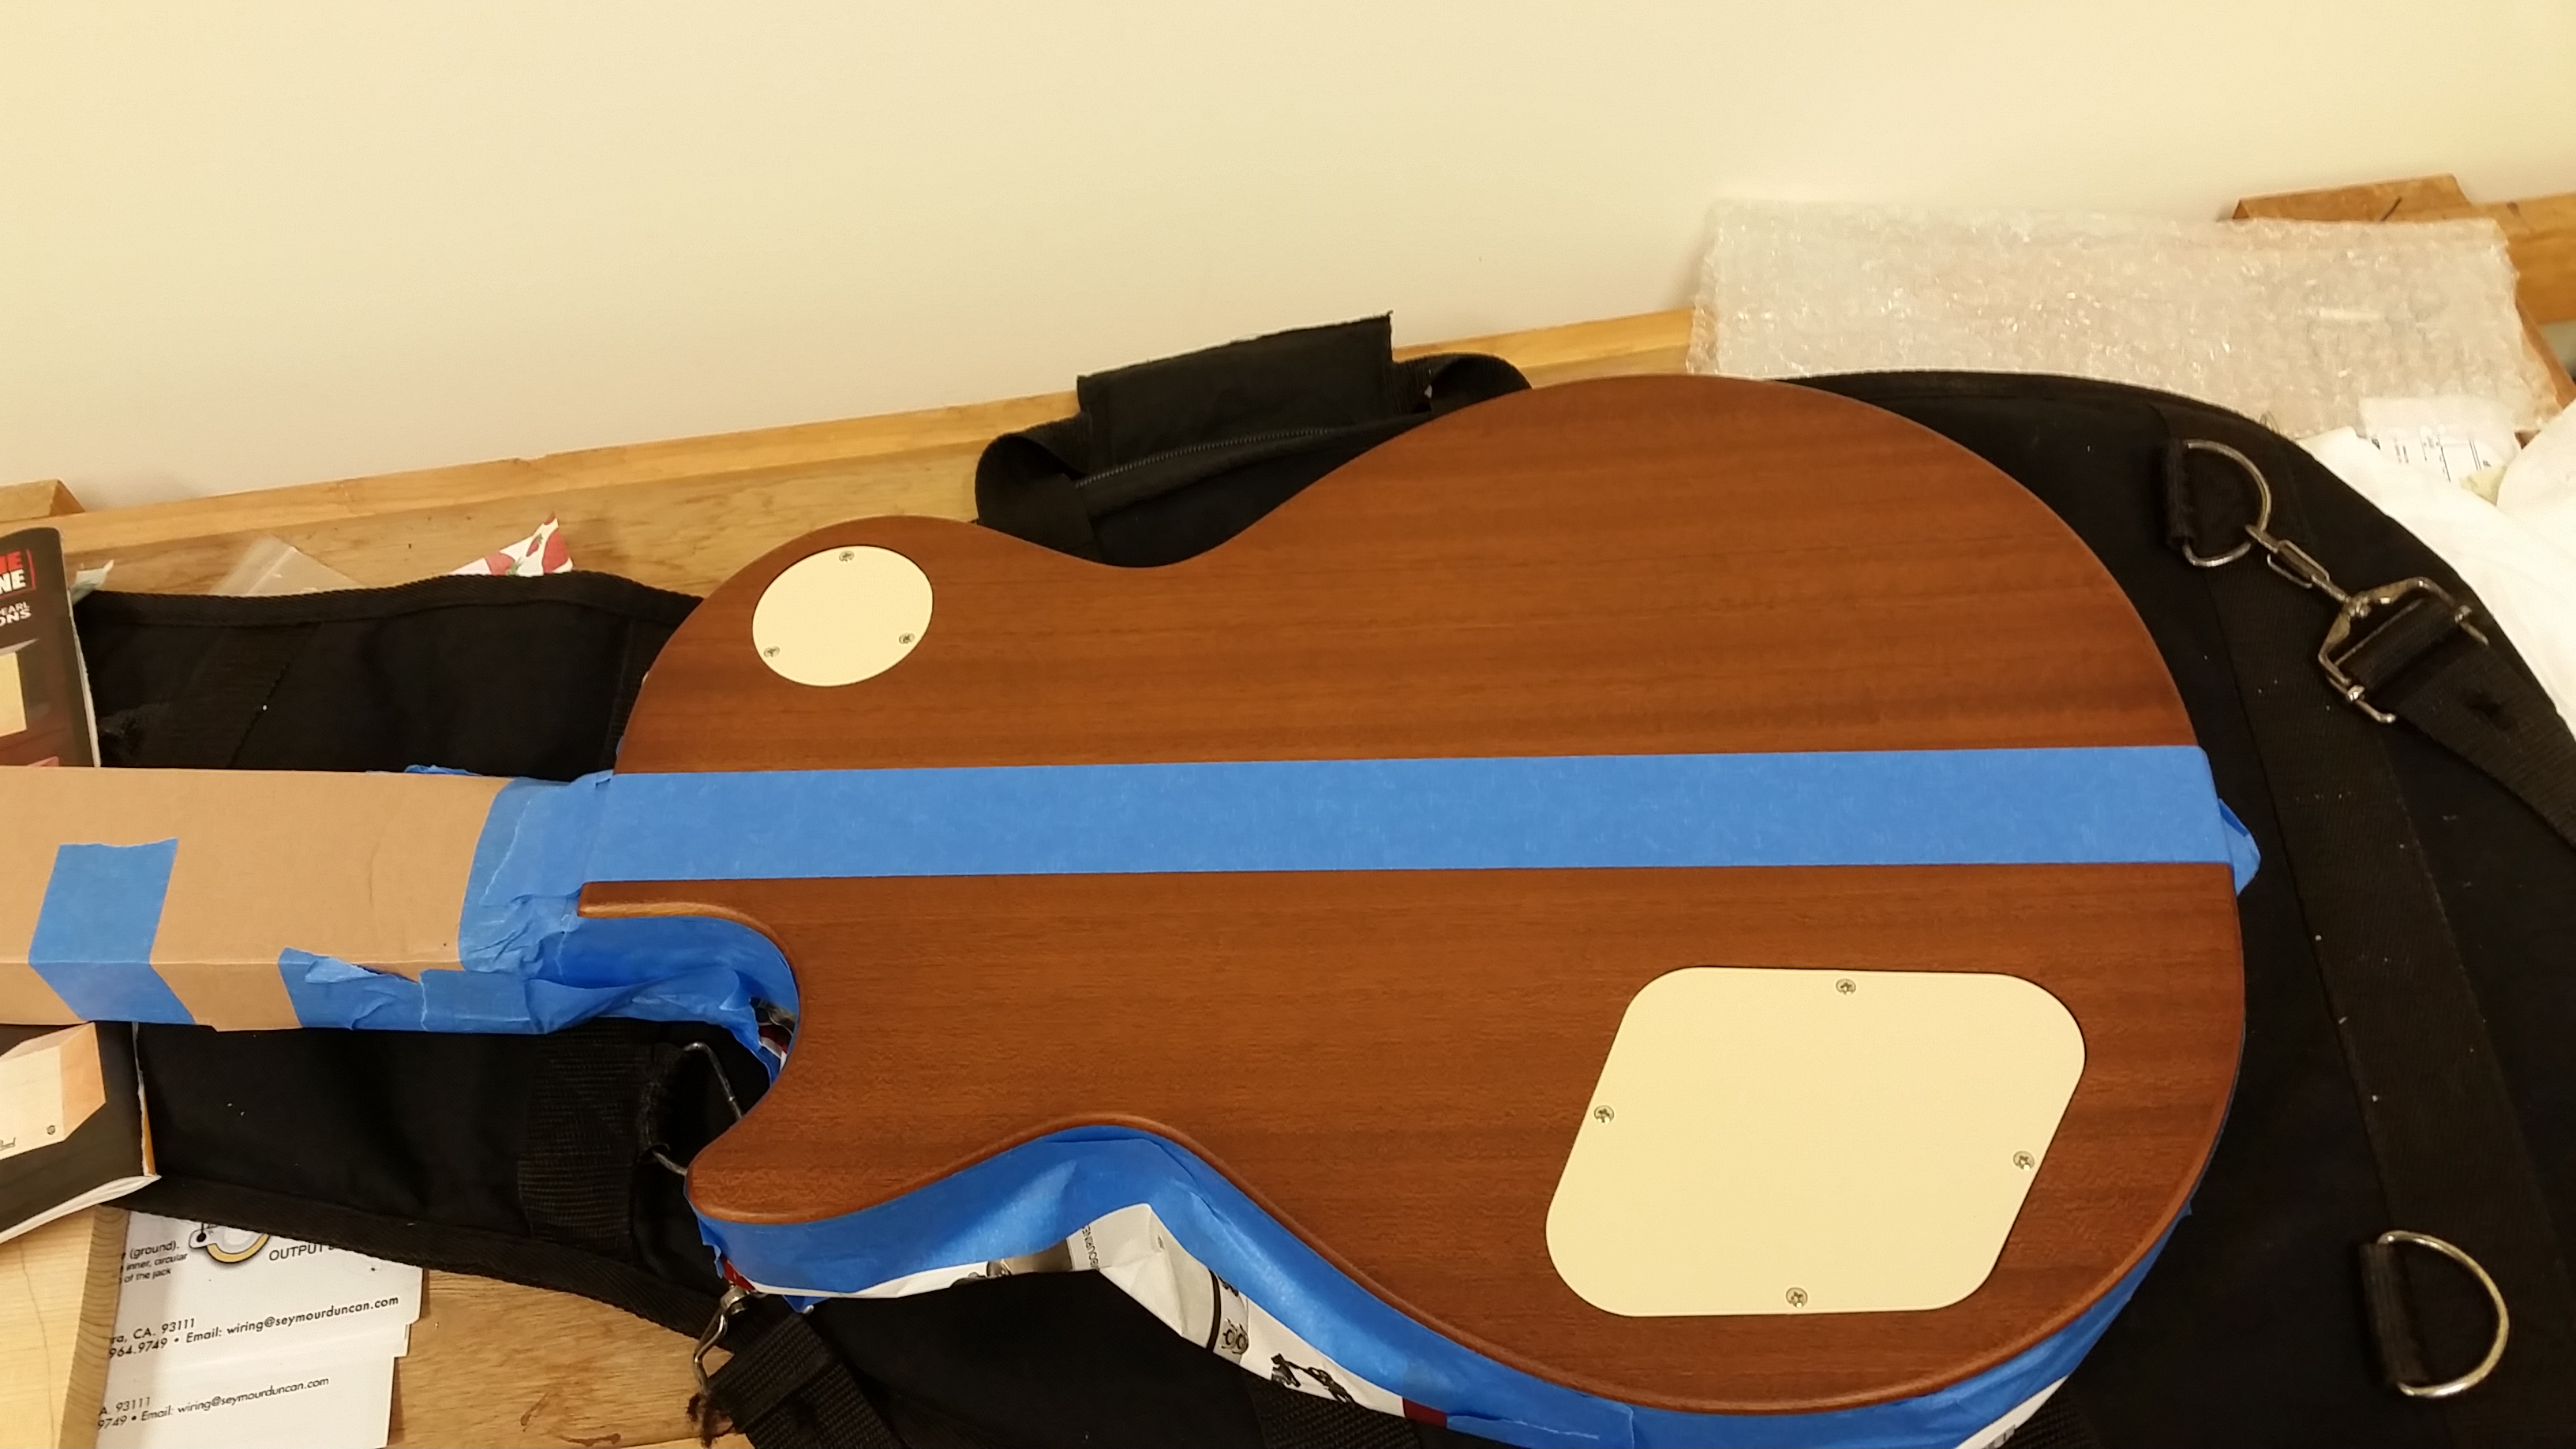
Now, to make the contrast obvious, I'm going to just do three layers of painters tape like a racing stripe. A little UV can penetrate one layer of tape, but I'm hoping 3 will make it opaque.
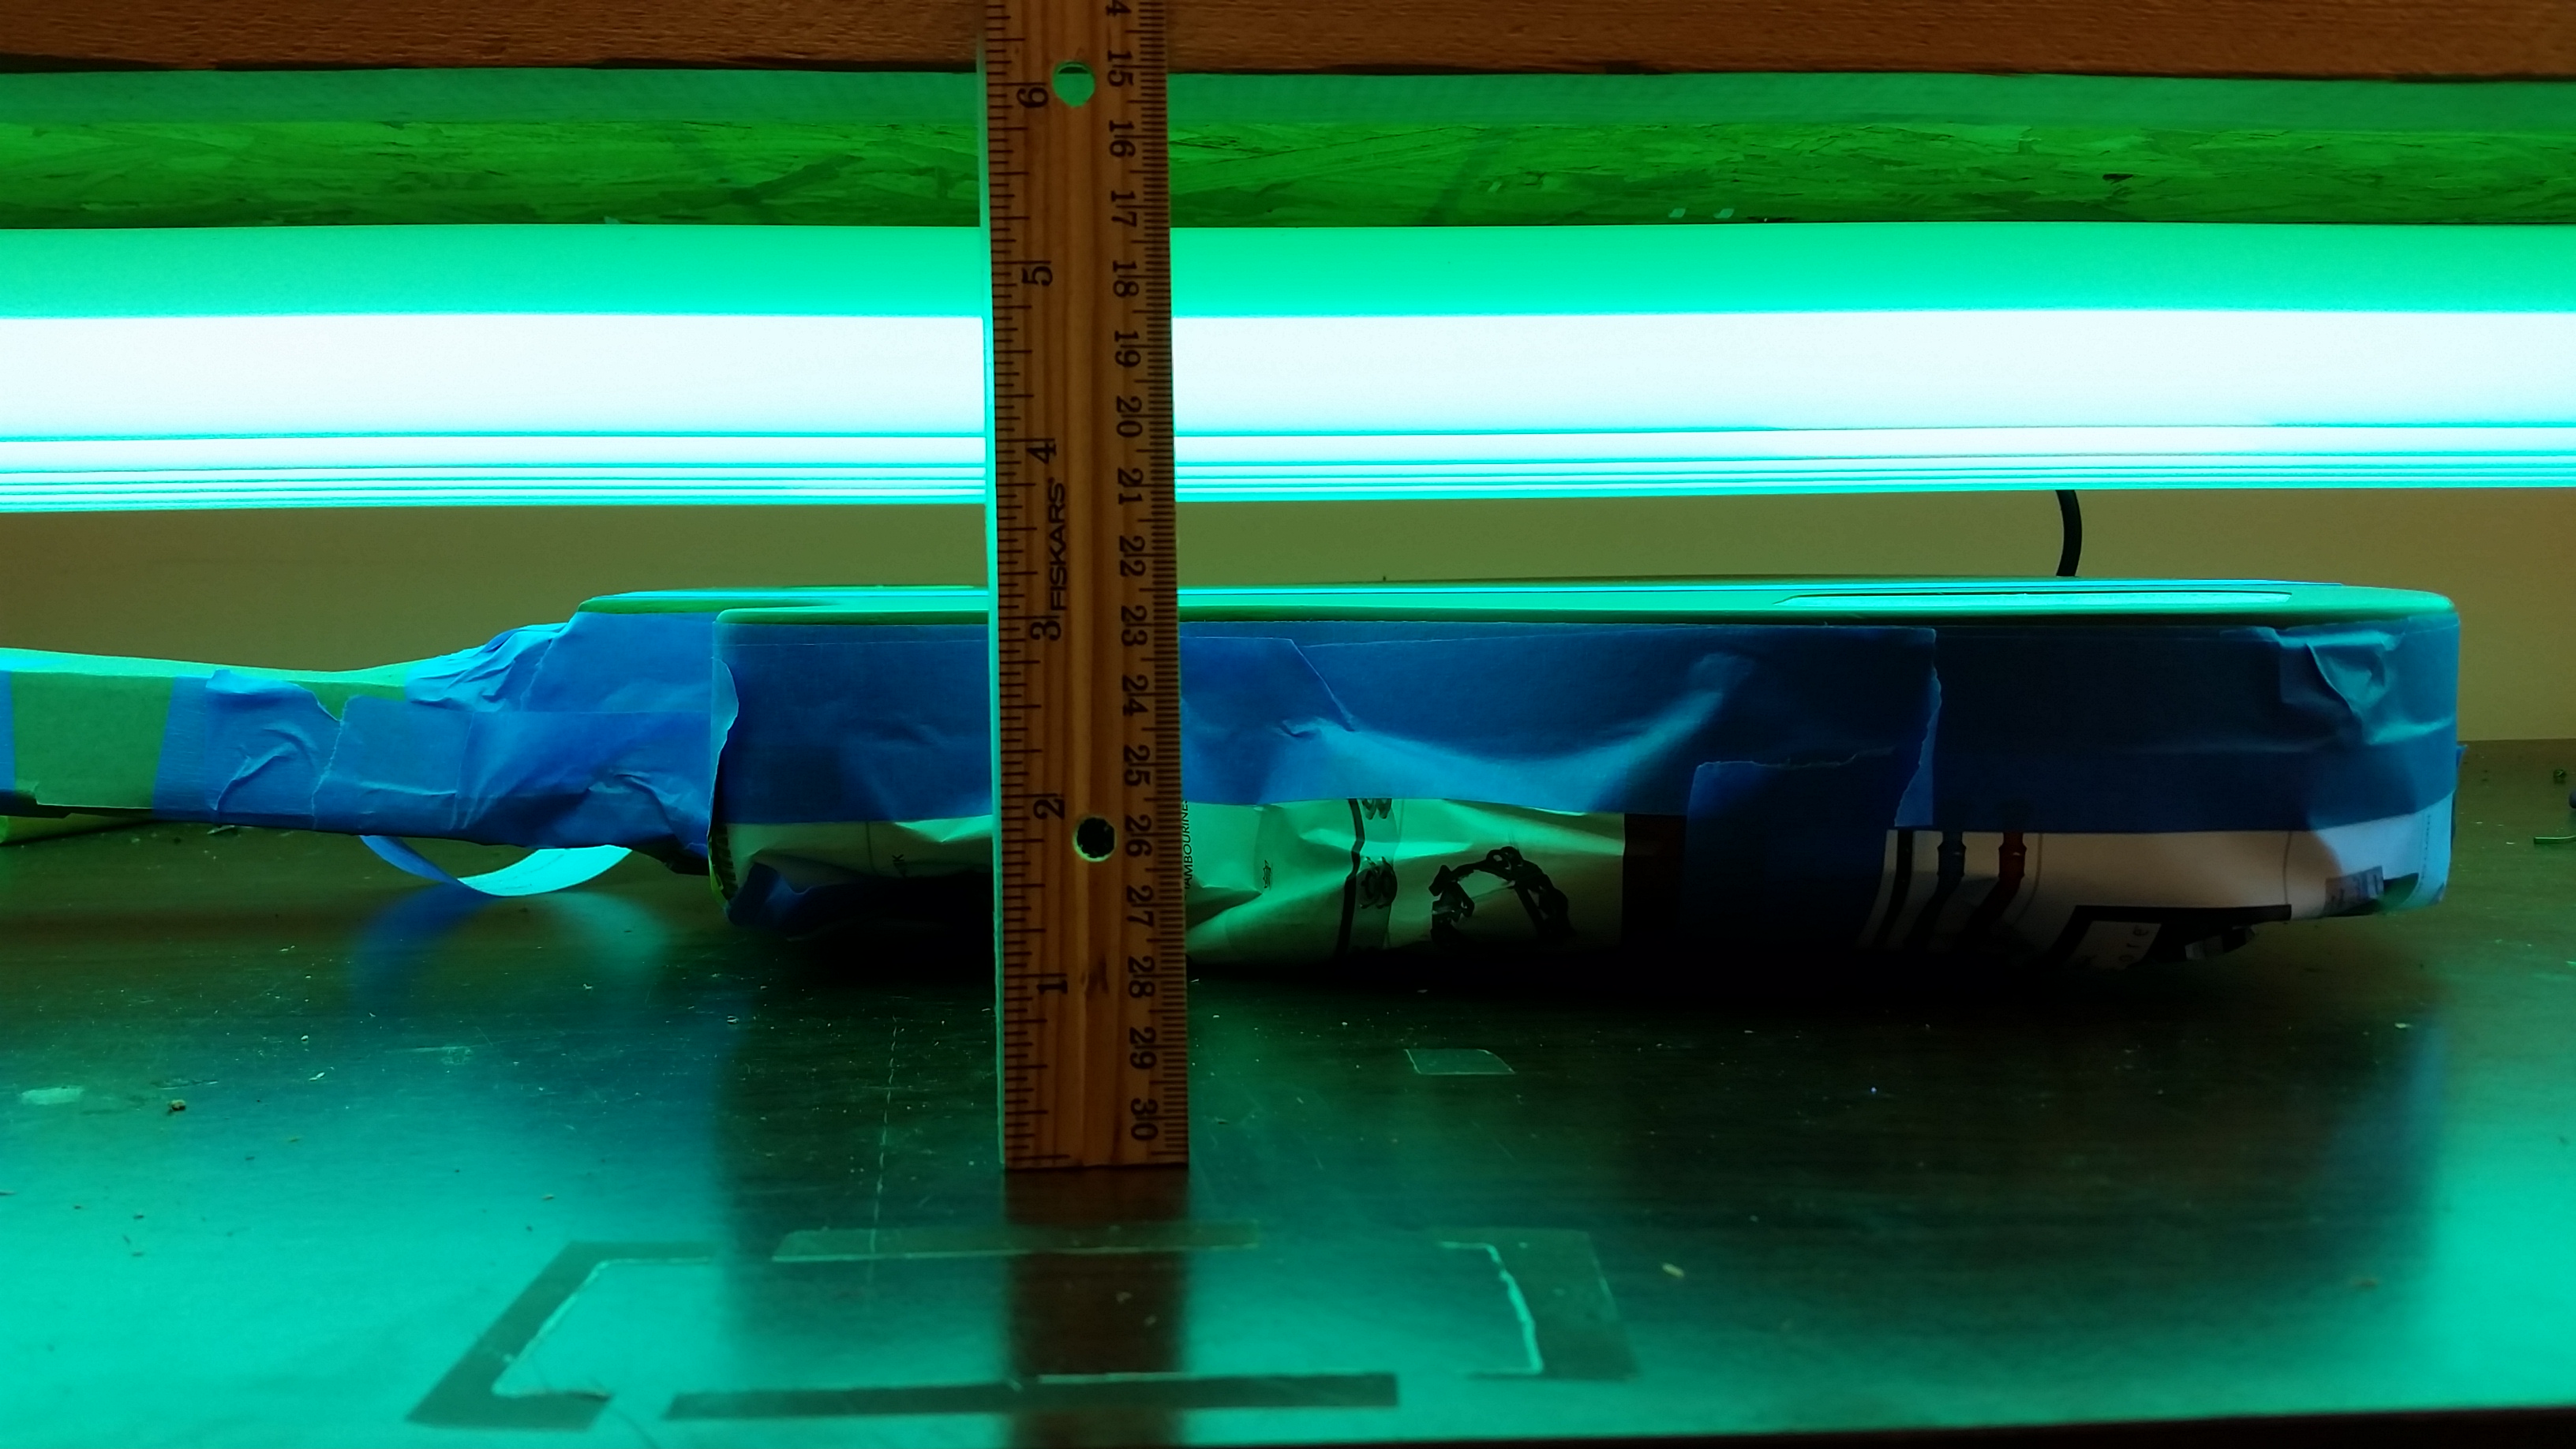
As you can see, we are using six F40T12 SG-1-40 lamps at 80 watts per, for a total of 480 watts, centered around 370nm. And we are not much more than an inch away. This is as close as you can get. Again, the lamps are at the end of life, so a fresh set will do better. The hour meter is at 3070.0 hours at start.
Update 1: After a few hours, I went ahead and added another 3/4" distance to the lamps since the guitar was getting hot. Just shimmed the entire rig using some small wood blanks.
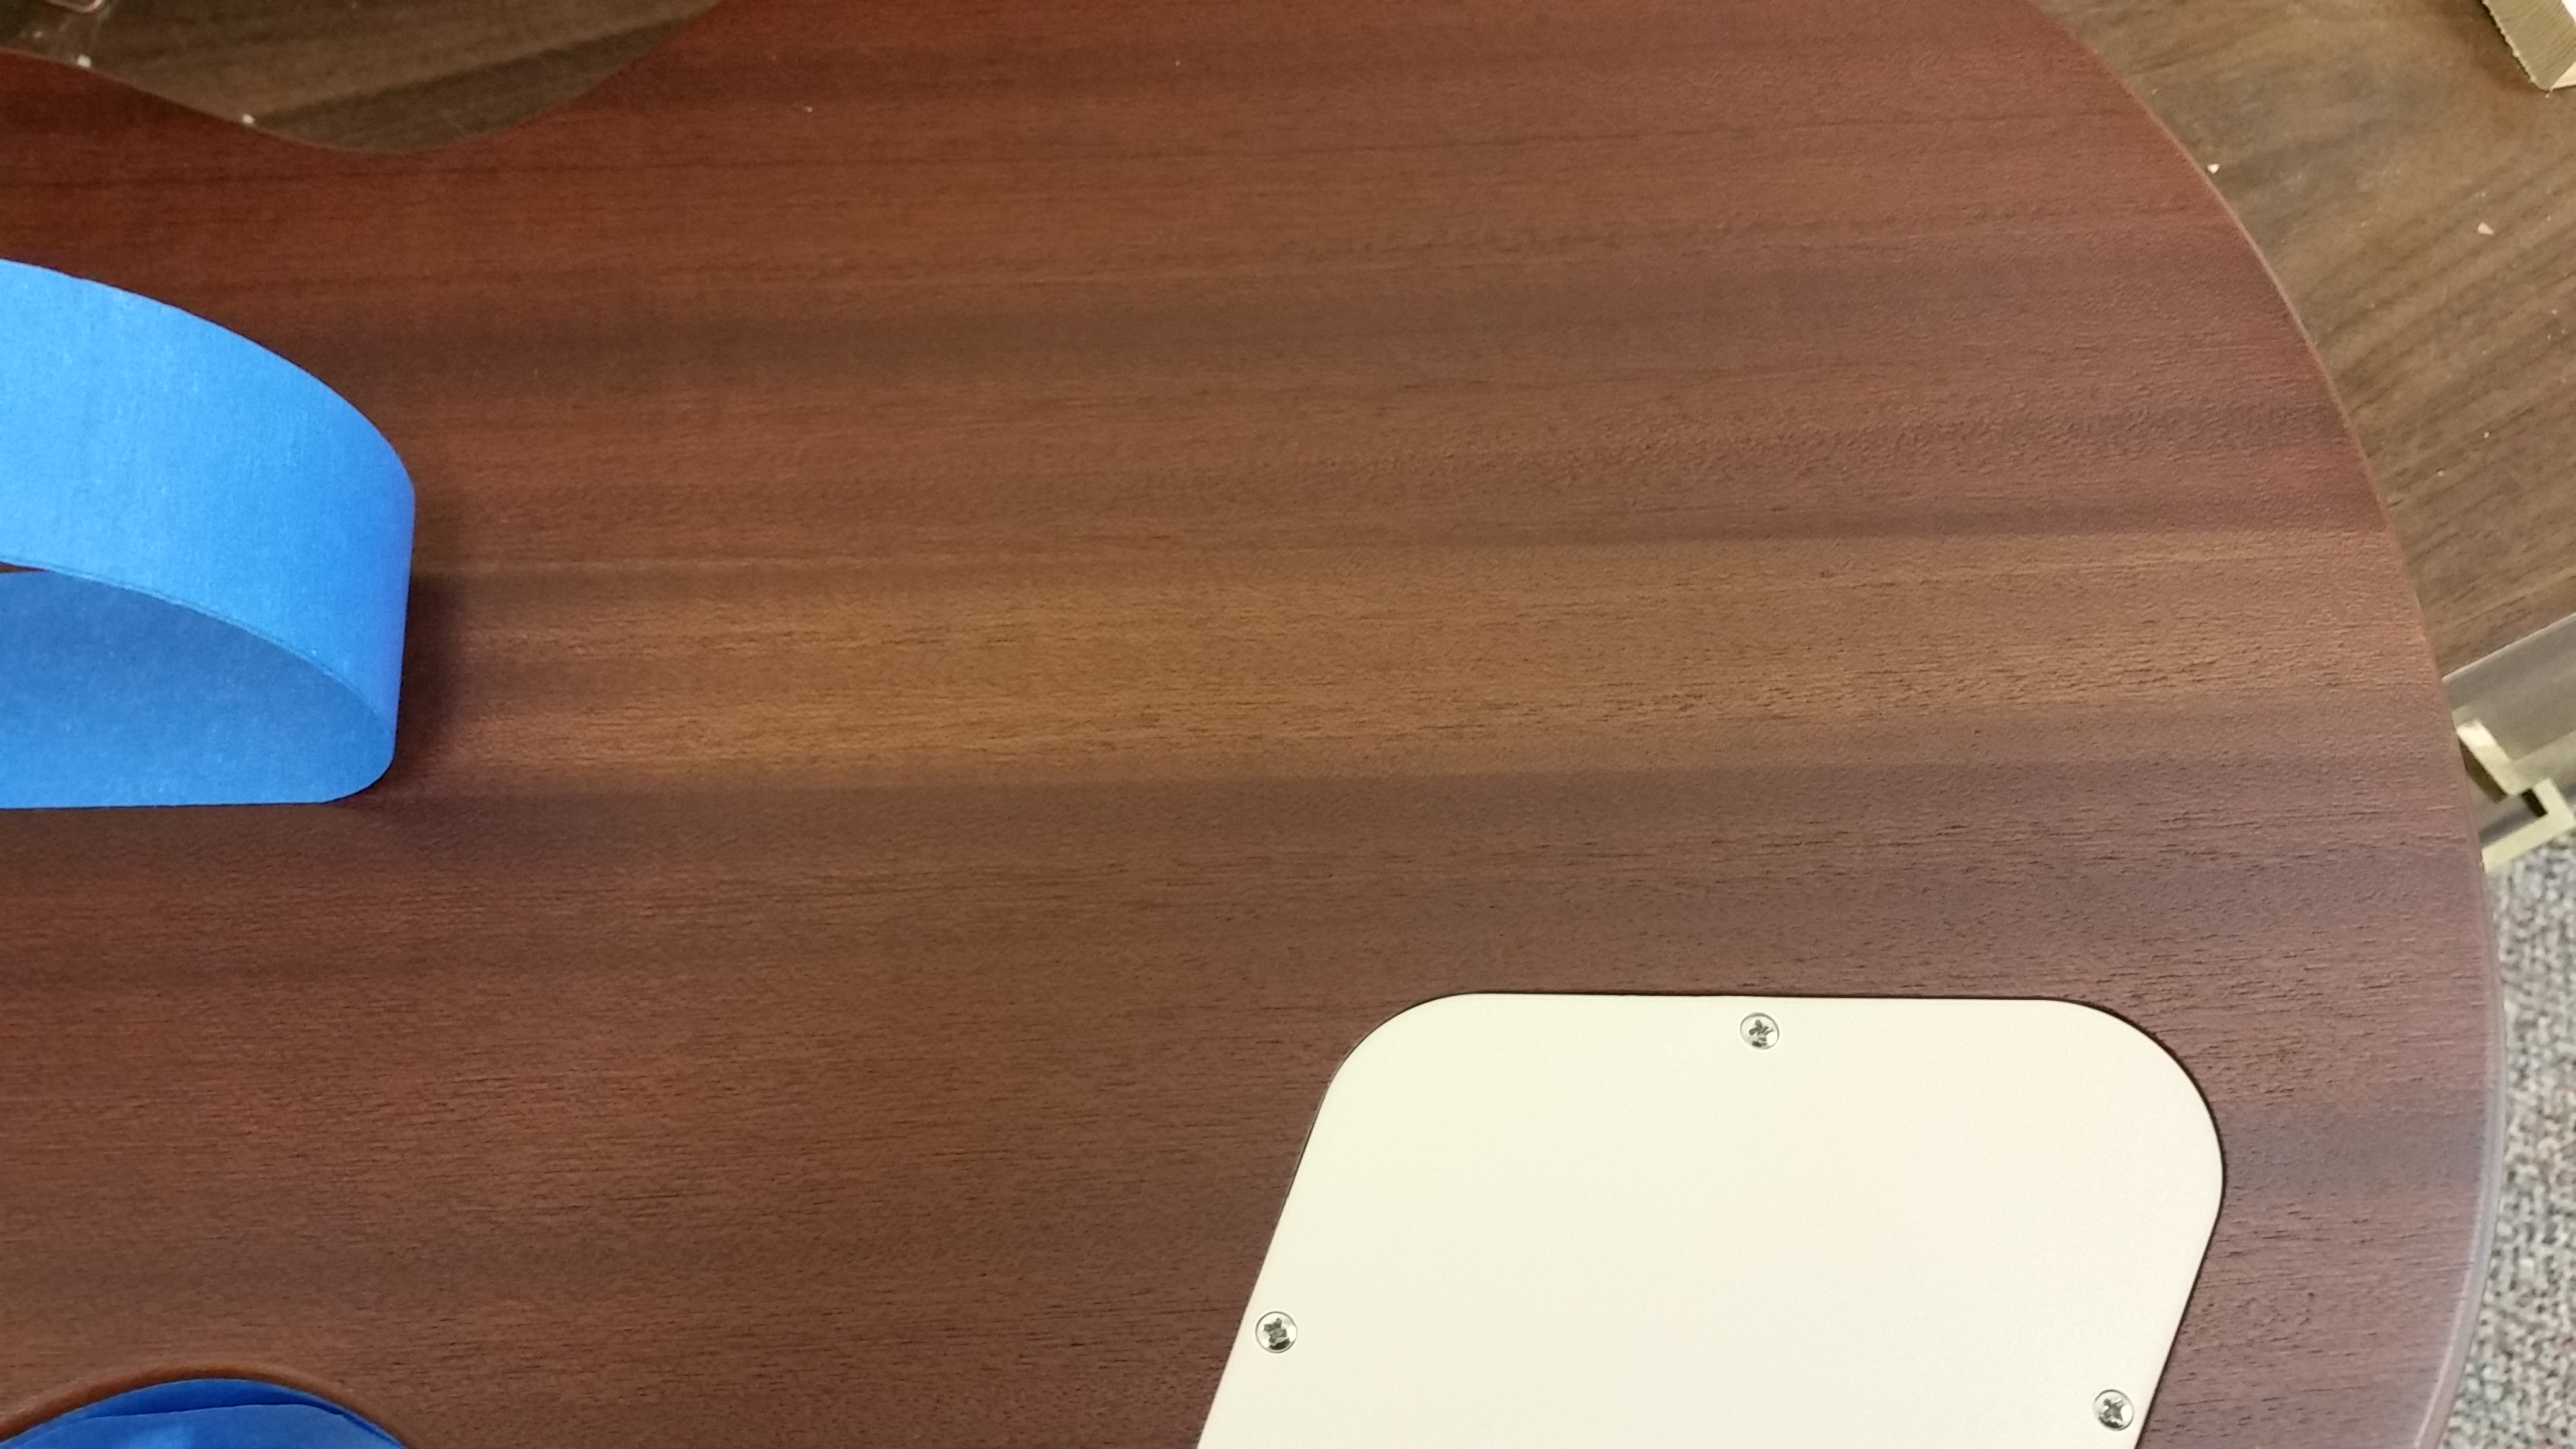
Update 2: This is after 25 hours of UV exposure. I pealed back the tape, and it is pretty easy to see that we are quickly darkening the wood. As a matter of fact, it is already at a point that most luthiers would want. This means 1 day of UV exposure at high wattage exposure using 6 to 8 lamps is enough to darken a single surface. This is the equivalent of aging through a sealer and base coat, or thinner coat of nitrocellulose. Since UV will actually cure nitrocellulose (not just dry it, but make it fully harden in a day instead of two weeks), this can be used in combination with nitro curing. Click on the image for a fresh window with a close up view.
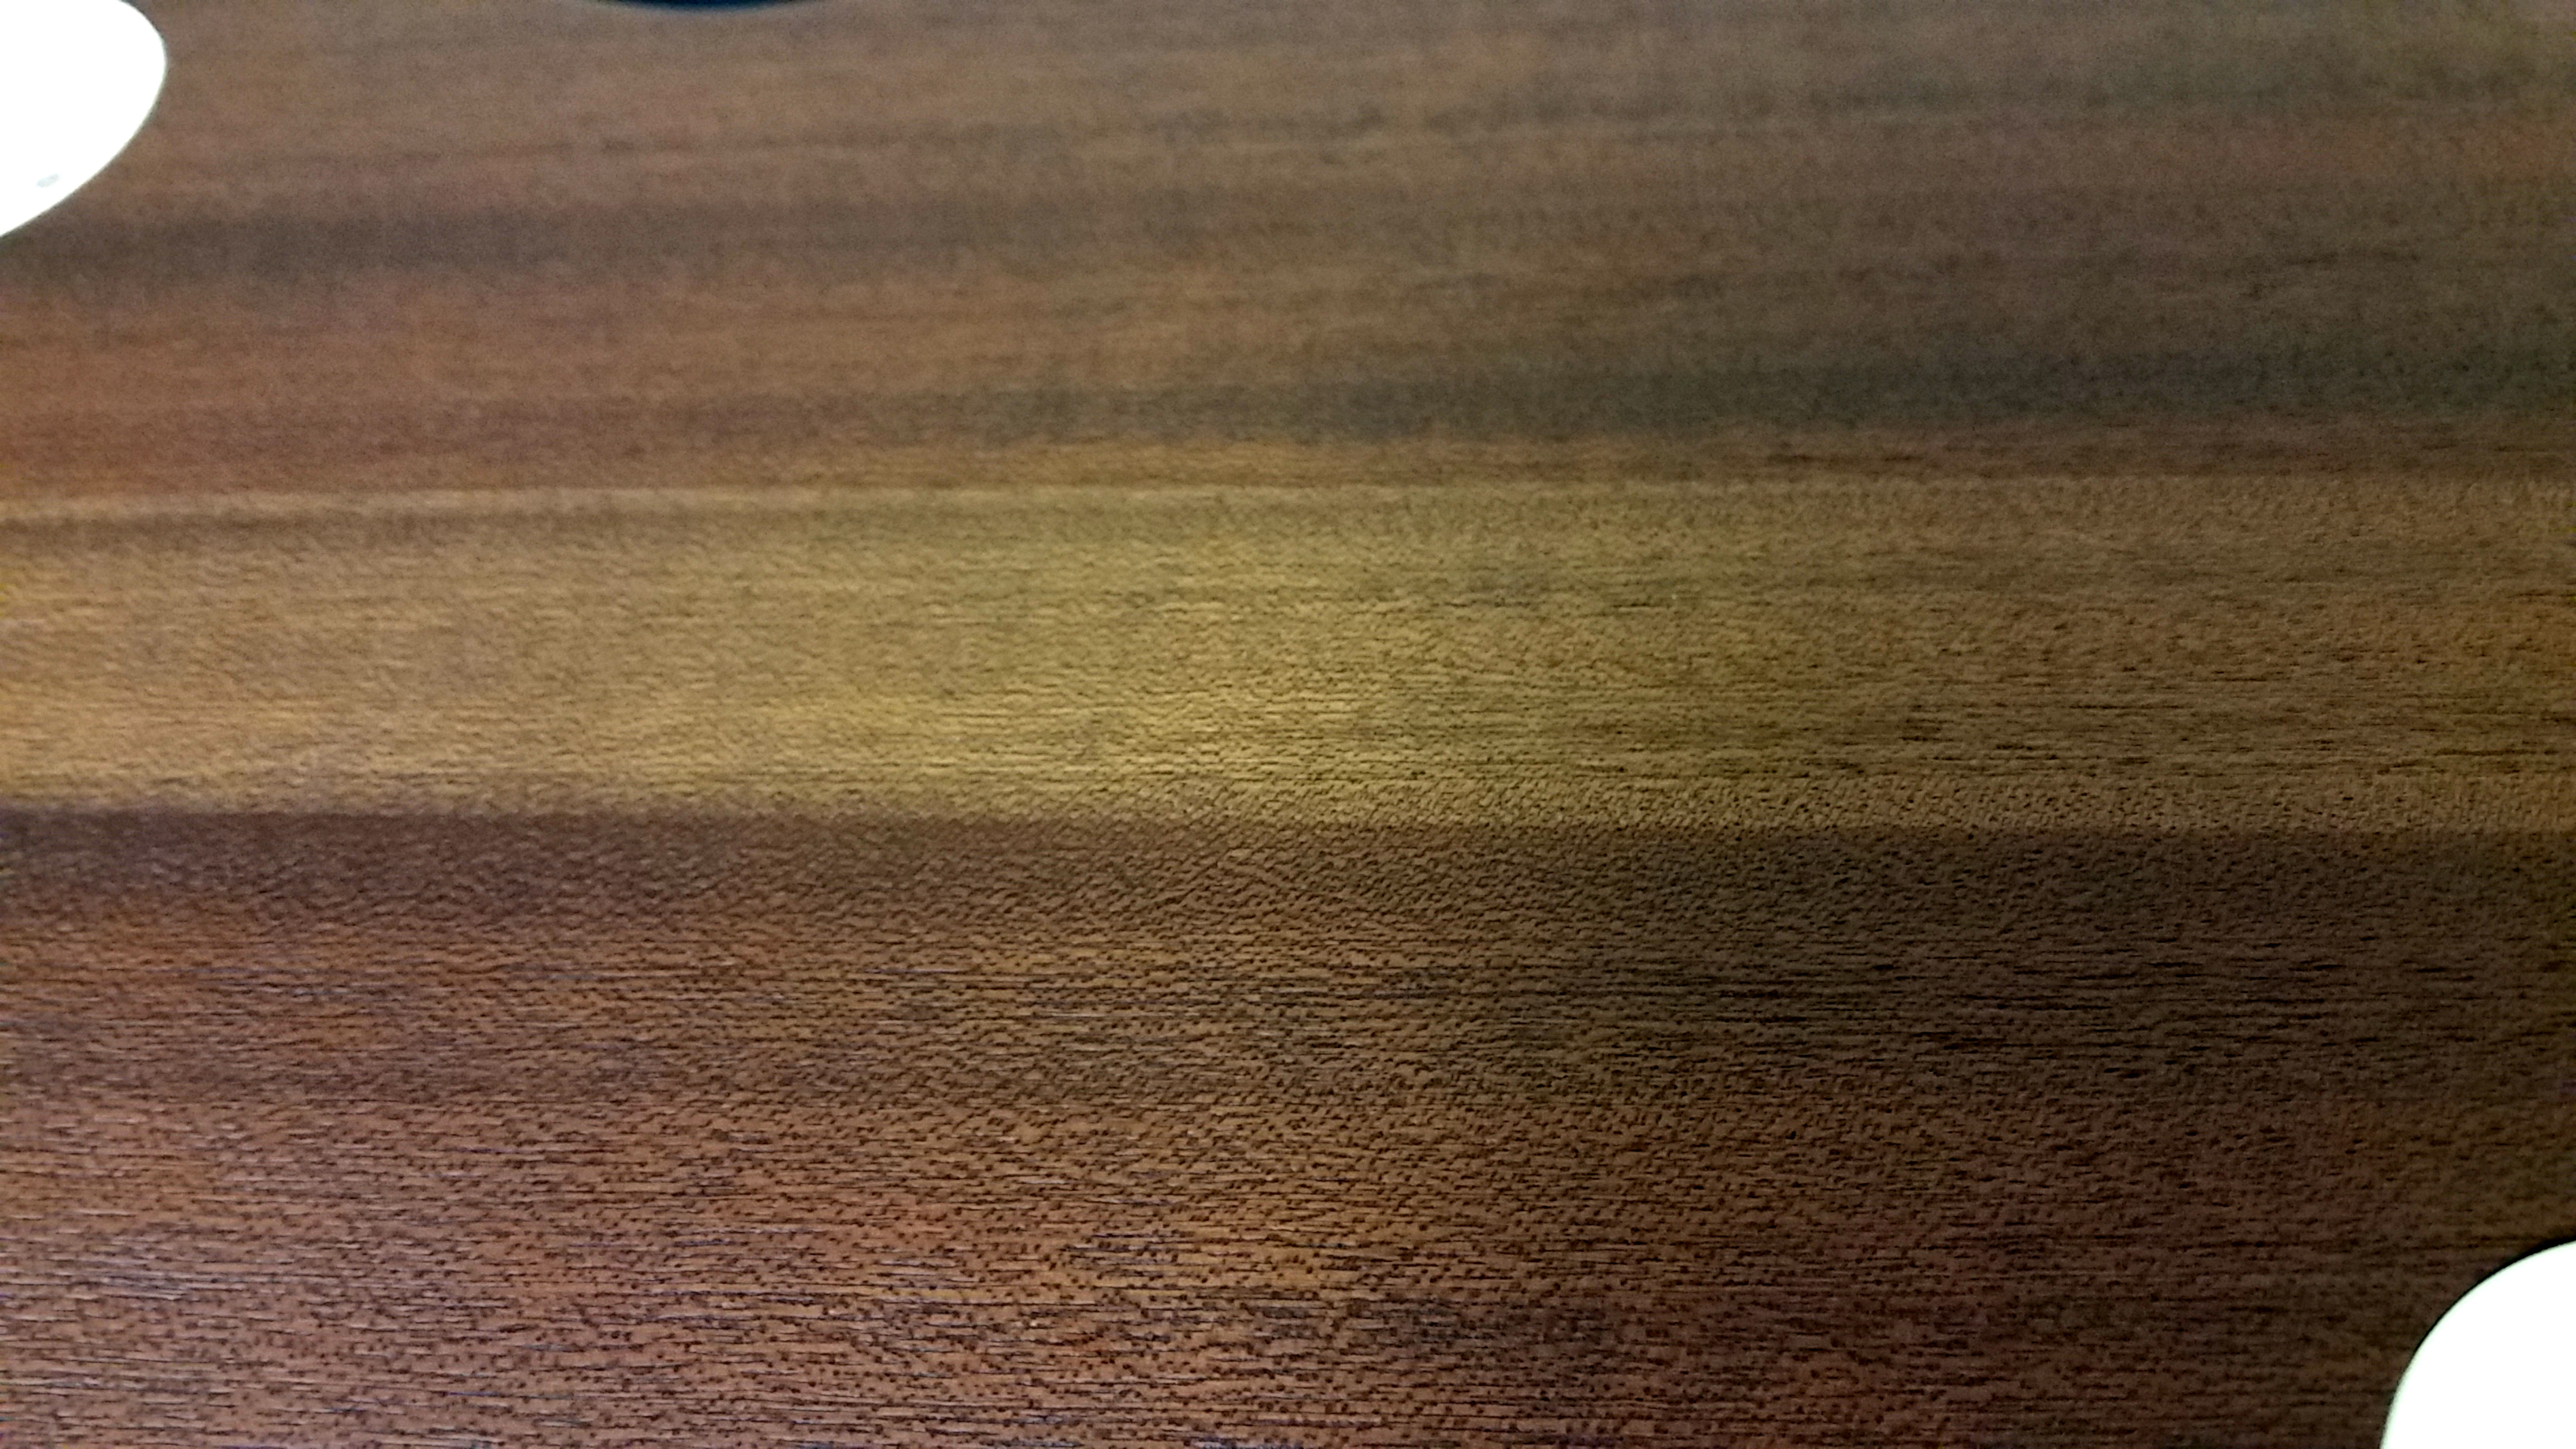
Update 3: At 3117.0 hours (47 hours from start) we have some new photos. I've stopped the rig because I can't possibly see any purpose in going for more, it is already really dark. The difference from 0 hours to 25 was dramatic. The difference from 25 hours to 47 is noticeable. You could probably keep going for 96 hours, but I'm guessing 1 or 2 days is all that most craftsmen are going to want. Pictures aren't the greatest, but I think the contrast of before and after is pretty obvious here. The actual contrast isn't quite as dramatic as the bottom image shows, but close. This is the limitations of the camera. The contrast is more than the first image here, however, so the final result is somewhere in between. More importantly, it brought out the natural contrast between the darker and lighter grain, and looks much warmer overall.
Depending on how that goes, we may go full boat and UV age the entire finish. Being an imported guitar, I'm fairly certain they are using a thin polyurethane finish, which is also what American made Fenders (and other guitars) use.
Reference photos, taken with the cell phone (Samsung 5, no adjustments for color), click on image for a new window and a close up. On an unrelated note, I was very pleased with the sound and playability of the guitar. The grain doesn't line up so great, I had to shoot from a special angle, as from other angles, the top half of the guitar doesn't show the flaming very well, so C+ for flame quality but an A+ otherwise.
On an unrelated note: Sounds as good as any of the Gibson Les Pauls I've owned over the years, which is pretty shocking for a $500 guitar. Honestly, I kept it at the house for over a week just to play it, and odds are good it will go into my personal stable. I'm more of a Fender guy (was a Gibson guy in the 90s) but now I've sold all my Gibsons. This is a respectable substitute when you need to make some Les Paul sounds.
The back wood looks wonderful, better than the images show. That is the primary focus of this test, to age the backside and see how (if) it fades through a satin finish. Click on any image for a close up view in a new window.
This one has a fair flamed top. Honestly, this is showing it from the best angle, if you look at it from other angles, the top half flattens out a bit. If it was a Gibson, I would have returned it, but for $500, you can't expect AAAAA flamed maple.
The bottom is really nice wood, hard to see the wood joins at all. The finish is kind of a flat one, including on the neck, but to be honest, that is what I prefer as I find glossy necks to be "sticky", and I usually work them down with 0000 steel wool anyway. I didn't have to do anything for this one to play or look nice.
Now we begin
This is an unusual way to test, but I'm going to tape off the sides as well as the front, so I only have to worry about one flat surface and not the crooks and crannies of the cutaway, etc. Normally, you would age those too, but I'm trying to test the lights, not make this a real final product. I decided to try the blue painters tape after using regular masking tape meant a lot of rubbing alcohol last time, to get the glue off. The UV lights really beats up the tape, and that pushes the glue off into the finish. It comes off with alcohol just fine, but takes a lot of elbow grease. Here is the taping process.
You might notice no lab coats, no fancy materials. We don't really build guitars or finish them here, so we have to make do. I'm betting some of your methods aren't so different.
Now, to make the contrast obvious, I'm going to just do three layers of painters tape like a racing stripe. A little UV can penetrate one layer of tape, but I'm hoping 3 will make it opaque.
Power on
I have several tests going on, but I'm going to use Rig #1 for this one. It is my first and favorite. I've loaded another ballast and pushing 80 watts of high frequency power (about like 100+ watts of a regular ballast) to each 4 foot lamp. I'm having to use some older SG-1-40s as the others are in use right now, and frankly, I don't want to pull some off the shelf. These have around 1600 hours on them, and would be considered at the end of life. Still, they should have adequate UVA for the job, even if they are a bit slower. We aren't in a hurry and one extra day isn't going to hurt anything.As you can see, we are using six F40T12 SG-1-40 lamps at 80 watts per, for a total of 480 watts, centered around 370nm. And we are not much more than an inch away. This is as close as you can get. Again, the lamps are at the end of life, so a fresh set will do better. The hour meter is at 3070.0 hours at start.
Update 1: After a few hours, I went ahead and added another 3/4" distance to the lamps since the guitar was getting hot. Just shimmed the entire rig using some small wood blanks.
Update 2: This is after 25 hours of UV exposure. I pealed back the tape, and it is pretty easy to see that we are quickly darkening the wood. As a matter of fact, it is already at a point that most luthiers would want. This means 1 day of UV exposure at high wattage exposure using 6 to 8 lamps is enough to darken a single surface. This is the equivalent of aging through a sealer and base coat, or thinner coat of nitrocellulose. Since UV will actually cure nitrocellulose (not just dry it, but make it fully harden in a day instead of two weeks), this can be used in combination with nitro curing. Click on the image for a fresh window with a close up view.
Update 3: At 3117.0 hours (47 hours from start) we have some new photos. I've stopped the rig because I can't possibly see any purpose in going for more, it is already really dark. The difference from 0 hours to 25 was dramatic. The difference from 25 hours to 47 is noticeable. You could probably keep going for 96 hours, but I'm guessing 1 or 2 days is all that most craftsmen are going to want. Pictures aren't the greatest, but I think the contrast of before and after is pretty obvious here. The actual contrast isn't quite as dramatic as the bottom image shows, but close. This is the limitations of the camera. The contrast is more than the first image here, however, so the final result is somewhere in between. More importantly, it brought out the natural contrast between the darker and lighter grain, and looks much warmer overall.
Final
This was actually one of the easier tests. We used six OLD aging lamps, well past their prime but we juiced them to 80 watts each. We got tremendous results in one day, and it would seem that 1 to 2 days is all that is needed for great results, and you would probably peak out at 4 days. If you were running these at 40 watts (pretty standard) then you can safely just double these times. Either way, it is fast, easy and cheap to make a new guitar look like a closet classic. Mission accomplished, at least for now. Maybe we will bake the front flamed maple top on another day....| Solacure Means Quality Solacure ultraviolet lamps aren't just good, we guarantee they are the best or we will give you your money back. Our patented glass is more transparent to UVA and UVB. Our custom cathode/anode sets lets you run 2 to 3 times more power than a standard lamp in the same size. All of our lamps have built in reflectors. We have a lamp for every need. We stand behind everything we sell and guarantee each will perform exactly to specification, or we will replace them. We don't want your business this week, we want it every week, and we are willing to earn it. There really is a difference in quality when it comes to ultraviolet bulbs, and Solacure tops the list. Order online, over the phone, or call us if you need a custom UV lamp made, with fairly low minimums (around 2000 pieces). We can make it happen. Buy with confidence: We like what we do, and we've been doing it for over 30 years. |
 Got a question? The best way is usually to email us at sales@solacure.com. |
Copyright ©1997-2025 Solacure, Inc. All Rights Reserved. 1-800-600-8118
